Methi paratha recipe with step-by-step pictures
I have attempted methi parathas very few times and I don’t have a proper recipe, and very recently I got this recipe from my friend, who makes this very nicely. So after knowing the proper recipe, now i wanted to try this and blog this one. So without any delay, I went to the market the next day and bought these fresh methi leaves, and tried the paratha. It came out very nice and i loved the texture of the dough while rolling it. Check out my methi thepla recipe too.
Methi paratha recipe
Easy to make methi paratha recipe, perfect for travel
Servings 8 rotis
Ingredients
- 1 small bunch of Methi leaves
- 2 cups Whole wheat flour
- Salt as needed
- ½ cup Milk
- ½ tsp Coriander powder
- 1 tsp Red chili powder
- ¼ tsp Turmeric powder
- 3 cloves Garlic crushed
- ¼ tsp Cumin seeds
- 2 pinches Ajwain | Omam
- 1 tbsp Oil
- Water as needed
- ¼ tsp Garam masala
Instructions
- Clean the leaves and cut them finely.
- Wash them thoroughly
- Crush the garlic (a mortar and pestle can do this job)
- In a kadai, add 2 tsp of oil and put the cumin seeds and crushed garlic.
- Just saute them for a minute.
- Add the methi leaves and throw in the chili powder, coriander powder, turmeric powder, salt, and garam masala(if using).
- Saute for 3-5 mins.
- Now switch off the flame and add this mixture to the atta flour
- Mix this nicely.
- Add the ajwain seeds.
- Add the milk and start kneading it into a smooth dough.
- Add water also as the quantity of milk won’t be sufficient to knead the dough.
- Add a tsp of oil to the dough and cover it with a lid and let this it for half an hour.
- Make equal balls out of this dough and roll them into circles.
- Since I decided to make parathas, I rolled them into a little thick circle.
- Heat a tawa and put the paratha in it.
- When it is done on both sides, add a tsp of oil and transfer it to a plate.
- Repeat this process for the rest of the balls.
- Serve hot with any pickle/yogurt.
Tried this recipe?Mention @jeyashris kitchen or tag #jeyashriskitchen!
Like our videos ?Subscribe to Jeyashris kitchen!
Notes
Note:
1. You can replace homemade sambar powder for chilli powder and coriander powder. 2. Adding garlic to this will subdue the flavor of methi, but not much more. 3. If you want the flavour of methi leaves in particular, just skip the procedure of adding garlic. 4. Sauting methi leaves will reduce the bitterness of the leaves.
1. You can replace homemade sambar powder for chilli powder and coriander powder. 2. Adding garlic to this will subdue the flavor of methi, but not much more. 3. If you want the flavour of methi leaves in particular, just skip the procedure of adding garlic. 4. Sauting methi leaves will reduce the bitterness of the leaves.
- Clean the leaves and cut them finely.
- Wash them thoroughly
- Crush the garlic (a mortar and pestle can do this job)
- In a kadai, add 2 tsp of oil and put the cumin seeds and crushed garlic.
- Just saute them for a minute.
- Add the methi leaves and throw in the chilli powder, coriander powder, turmeric powder, salt, and garam masala(if using).
- Saute for 3-5 mins

- Now switch off the flame and add this mixture to the atta flour
- Mix this nicely.
- Add the ajwain seeds.
- Add the milk and start kneading it into a smooth dough.
- Add water also as the quantity of milk won’t be sufficient to knead the dough.
- Add a tsp of oil to the dough and cover it with a lid and let this it for half an hour.
- Make equal balls out of this dough and roll them into circles.
- Since I decided to make parathas, I rolled them into a little thick circle.

- Heat a tawa and put the paratha in it.
- When it is done on both sides, add a tsp of oil and transfer it to a plate.
- Repeat this process for the rest of the balls.
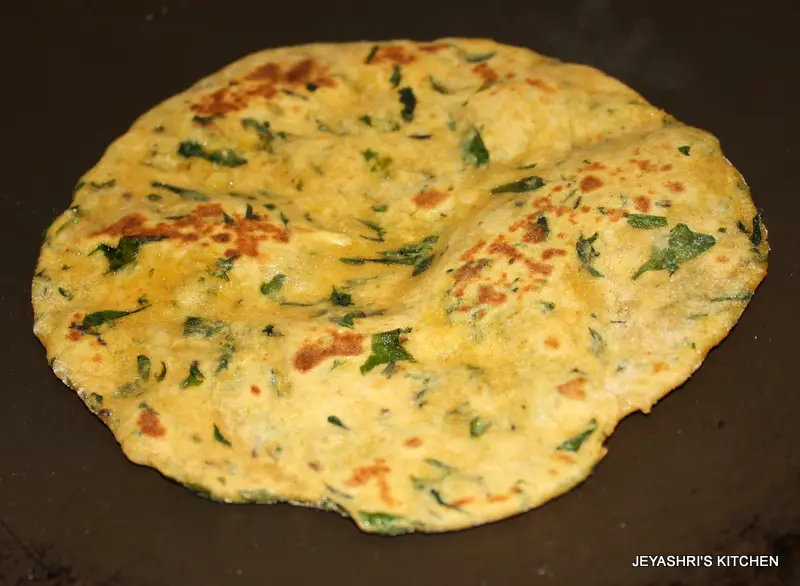
- Serve hot with any pickle/yogurt.


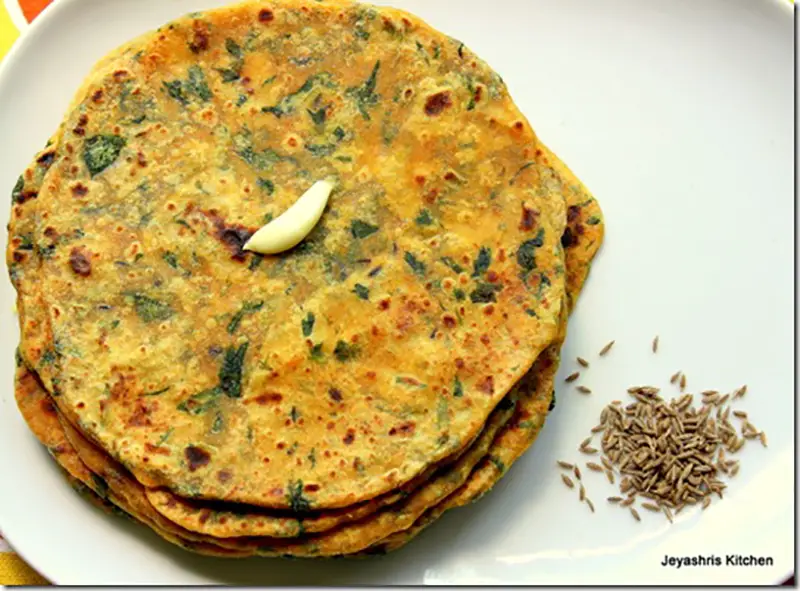



One of my favourite parathas… Absolutely delicious!
Wow..my all time fav..looks delicious !!
Clicks are very very tempting:)
Thats toooo quick rachana and aipi.
Thanks for ur encouraging comments
wow…lovely paratha jeyashri…delicious..
Beautiful & perfect looking paratha..nice click too..:)
I love them….I dont add garlic,rest all same..and I dont even saute them..I like to use them fresh.
I like it…. I add 2 peanut sized jaggery and dont add garlic….
Lovely click 🙂
lovely clicks jeyashri,looks yum
thanks for sharing such a wonderful recipe.even I am gonna to make this 2morrow.
Nice clicks….luv methi thepla very much….just need raita to finish off the plate
fav paratha…..looks so tempting and soft!!!!
Excellent one dear!!! beautiful pics.
Looks so perfect !!! Reminds me of my Mom..She makes all kind of stuffed paratha's. I'm surely trying this..Bookmarked !!!!
My very very fav one and i dont saute them… rest are same. Pictures are beautiful.
Wat a healthy parathas, looks awesome..
Perfect parathas n healthy tooo…
looks yum!
Adding garlic is a nice twist to methi paratha,will try once! Love the first picture very much!
fantastic paratha,very tempting pics…
Totally new way for me to make methi paratha, love to try this. Come and collect your award from my blog.
Hi,
great healthy paratha…
lovely clicks too!!!
sameena
http://www.myeasytocookrecipes.blogspot.com
oh I love this..looks so yummy!!
Looks so delicious paratha..
Sounds healthy and delicious, lovely click…
https://treatntrick.blogspot.com
flavorful paratha…looks perfectly yumm
One of my favourite parathas!
Absolutely delicious and tempting. Luv the pictures too
jeyama, its looking wonderful…i got the feel of eating it….
looks very very delicious and tempting… will definitely try it out
Can we knead the atta previous night itself &refrigerate it
Yes you can do it. Keep it in a airtight container